To test android programm its necessary to run it on android device or on Android Virtual Device (AVD) called emulator.
Follow these steps to create AVD.
Step 1:Click the icon on the Eclipse toolbar

Or click on “Window” menu and then “AVD Manager”
Step 2:This window shows all available AVDs, To create new AVD click on “New” button.

Step 3:Enter AVD Name (any name).
In “Targget” field select android platform that you required in development.
Leave “SD Card” field blank (Fill it if you want to use SD Card).
Check this link for advance settings to use SD card Setting-Up-Emulator-Advance-Features.
Leave selected “Built-in” for “Skin”.
Check this link for advance settings to use “Hardware” Setting-Up-Emulator-Advance-Features
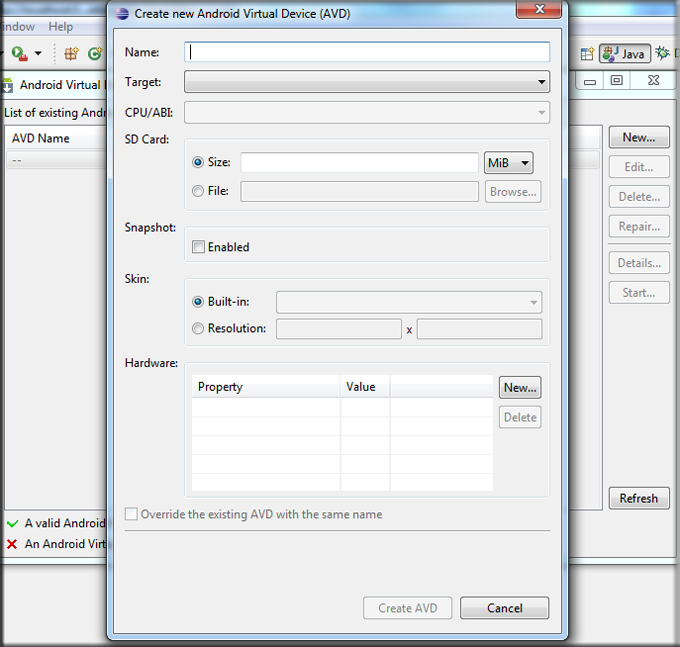
Step 4:Finally click on “Create AVD” button.

Your AVD is ready to use, Select AVD (Emulator) and click on “Start” button to test it.

Click on “Launch” button.

Now explorer the android emulator (AVD).
For more advance aoptions to create emulator (AVD) check this link Setting-Up-Emulator-Advance-Features.
Gud BYe!